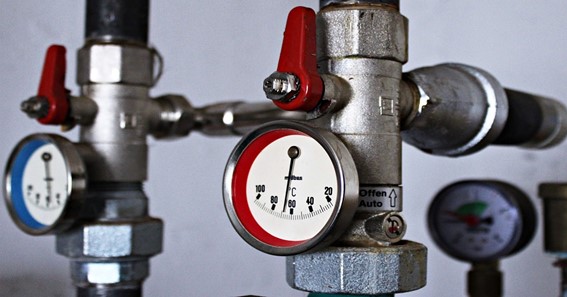
How often have you woken up in cold weather? It’s both annoying and frustrating. You could probably go to bed with the radiator thermostat set at a warmer temperature. But if your system won’t turn off when it should because of a malfunctioning thermostat, the whole house will keep getting colder. Did this ever happen to you? A thermostat is supposed to allow the temperature of a building to be controlled automatically by turning the heat on when the temperature falls below the set value and off when it reaches that preset value.
A faulty thermostat can cause several problems in your heating system: It could prevent the furnace from firing up, which means no heat. It could cause the furnace to fire up continuously, or it could cause the furnace to stop firing up. If this occurs, you will feel how much damage a malfunctioning thermostat can do.
You need to fix the leaking radiator thermostat problem as soon as possible for your safety and comfort. The following tips may help you determine if your thermostat has a problem and what to do about it.
Steps to fix leaking thermostat
If the heater in your house is running excessively, it might be because you need to replace a leaking thermostat. A leaking thermostat might also cause your heating system to run constantly and not shut off when rooms reach the desired temperature. Over time, a faulty thermostat can cause a great deal of damage to a central heating system. Replacing a faulty thermostat is an easy do-it-yourself job that you can accomplish in just a few hours with some essential tools found around the house or purchased at your local hardware store.
Tools and Materials: Before beginning, gather up all of the materials you’ll need to complete this project:
- Pry bar
- Adjustable wrench
- Replacement thermostat
- Screwdriver
- Flashlight and batteries
Step 1: Prepare the Heating System
First, turn off the furnace in your central heating system to prevent the chance of it starting while you’re working. When you open up a heating system, carbon monoxide is released and can be dangerous. It is recommended that you work in a well-ventilated area and use protective gear such as gloves and safety goggles while working on heating systems. This is also an excellent time to inspect the filter in your furnace since it’s likely dirty from years of dust buildup.
Step 2: Remove Your Old Thermostat
Next, locate the thermostat. The thermostat will be located at the furnace or boiler in your home. This is often found near a vent or on an outside wall. If it’s extremely cold, you may even find this unit covered in frost. Locate the screws holding down your old radiator thermostat and remove them. Once you have removed all of the screws, carefully pull your old thermostat away from the wall.
Step 3: Remove the Thermostat Wires
The wires on your new thermostat will fit into many different screw terminals on the back of your heating system. To ensure a safe and proper connection between your new thermostat and heating system, examine the wiring from your old unit. You want to match up the color of the wires on your new thermostat with those on your existing system. Once you have determined this, disconnect each wire one at a time by turning off the appropriate circuit breaker for safety then unscrewing the wire using an adjustable wrench.
Step 4: Install Your New Thermostat
Insert the wires on your new thermostat into the corresponding terminals on your existing heating system, then screw them down securely with an adjustable wrench. Replace the faceplate for your new thermostat once all of your wires are attached to their corresponding screws. Next, turn the circuit breakers in your system back on one at a time, then flip the main power switch in your home to test out your heating system.
Step 5: Reset Your Thermostat
When you replace a radiator thermostat, it will reset itself once it’s been plugged into an electrical outlet, but you should set it to the desired temperature anyway. If your home is really cold, remember that it will take a few minutes for your heating system to kick on and warm up enough for the thermostat to register the change. Once this happens, however, your new thermostat will send signals back to your central heater so that it can keep up with your desired temperature.
Conclusion
Once you have completed the above steps, you can call yourself a heating system professional! Replacing a faulty thermostat is an easy do-it-yourself job that anyone can accomplish in just a few hours. The essential tools are patience and determination since it will take some time for you to research your heating system and gather the necessary materials.