Filmora’s Full Editor view resembles that of utmost Video editing operations, with a three-panel layout for source content, a Video editing exercise, and a timeline across the bottom. You can switch between black and light-argentine window borders, and the program respects your system’s dark or light mode setting. You cannot pull off panels, but you can sharp-screen the Video editing exercise and acclimate the relative sizes of the panels.
When you start a design, you have a choice of Widescreen, Instagram (1×1), Portrayal, Standard, or Cinema aspect rates. From Train> Design Settings, you can set a custom size if you like, as well as choose the frame rate.
Important mode- switching buttons are always at the top leftism of the interface Media, Audio, Titles, Transitions, Goods, Rudiments (plates), and Split Screen. At the top right are buttons leading to tutorials, help, your account, the Savepoint, the app’s communication center, and the capability to download further content from Wondershare Filmstock, similar to goods, vids, prints, and audio.
You can fluently shrink and expand the timeline with Ctrl- Mouse Wheel or move back and forth with Alt- Mouse Wheel. There’s a hunt bar for anything you have in the source panel, and clear undo and Redo arrows. Buttons above the timeline offer Cancel, Crop, Speed, Color, Green Screen, Stir Track, Keyframing, and Edit — the last of which opens a panel showing expandable entries for the utmost of the former bones.
Effect controls in Wondershare Filmora
The number of tracks looks limited at first, but whenever you add another videotape clip below your main bone, another track is added so you can keep overlaying. PiP works fluently, with WYSIWYG resizing handles in the exercise.
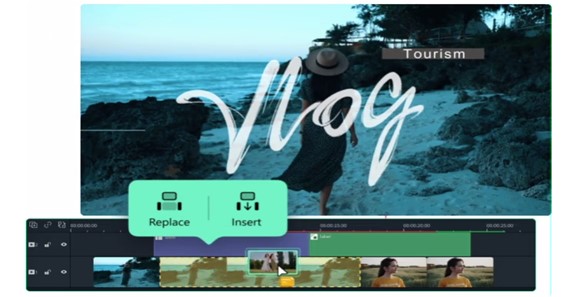
The program enforces a glamorous timeline approach whenever you drag a clip onto the timeline, it snaps right to the former clip, so there is no way any space in the movie. Bus-Ripple is also on by dereliction to keep your movie gap-free, but you can turn this off if you prefer. You can trim from the launch or end of a clip, but the current- position line shows scissors, letting fluently resolve the current clip. There is no trouncing in the source charger, still, so professionally trained editors may not feel at home. Also missing are advanced editing modes like a slip, slide, and roll, but for consumers, that’s presumably for the stylish.
A plus subscribes on each clip lets you fluently add it to the timeline at the insertion point. In addition to the timeline view, there is a Storyboard view that simply shows clip thumbnails, with spots for transitions in between.
Once again, the Speed Adjustment tool is straightforward and effective. It also has a Freeze Frame feature, which I appreciate. Simply press the Slow, Fast, Normal, or Reverse button above the timeline, then enter the fraction for slow and a percent for fast. In the timeline, the time change is simply written at the start of the clip. You can even combine backward and acceleration. Simply put, the freeze-frame adds a 2-second still clip of the current frame.
Only position, rotation, scale, and opacity may be utilized with keyframing, which is new since my last look at the software. It’s a good start, but certain programs, such as Pinnacle Studio, let you use keyframes to time almost any effect or transformation.
Title and Text Effects
Wondershare titles Filmora
Filmora contains over 200 well-designed text and title designs, some with unique animations, so adding titles and text is a breeze. Even the professional-looking title templates can be customized directly in the video editing preview window. The Advanced Text Edit dialog allows you to further customize your text by changing the movement, typeface, and color fill.
- Sentence Wise Result
- Document View
- Matched Sources
- Instant Cutter
- Instant Cutter in Wondershare Filmora
- Instant Clutter
It’s veritably simple, with but one purpose, as its name implies. You can drag multiple clips onto its window, but only if you’ve named its Mergesub-mode. The Trim mode is just for trimming the ends of a single clip, and its interface does not indeed show further than one clip in the left-size source charger. You can Add Parts, which means creating a new clip grounded on your trimmed original, but you cannot explicitly resolve a clip. For some test clips, I got an error saying they were not supported, still.
Plenitude of Transitions
Transitions in Wondershare Filmora
are ten orders, including Basic, 3D, Ripple & Dissolve, Speed Blur, Warp, Lifestyle, Slideshow, Linear, Plain Shape, and Filmstock. You can designate those you use frequently as Pets, for easy access. Filmora is used for unusual in YouTube video editor schematic plates to show what the transitions do; most programs simply show a sample A to B vitality.
When you add transitions either with the else sign on the right side of its summary, the program places it inside the edge of the clip — I find this odd since you typically want the transition to span the current and coming clip. Thankfully, you can do this fluently by dragging the transition’s timeline entry with the mouse; it automatically snaps to the midpoint between clips. You can also edit the quantum of time a transition spans by dragging its edge. Double-clicking a transition entry opens a panel where you can decide whether the transition is lapped, prefixed, or postfixed to the clips.
Special Goods and Color Editing
As mentioned before, it’s easy to produce PiP (picture-in-picture) goods, and you can move and resize PiP windows right in the Video editing exercise by clicking on the applicable timeline. Chroma Key (aka green screen) worked veritably well and automatically for my test footage indeed with limp hair, which can frequently be delicate to mask.
Subscribe to our Subscription Plans
Filmora is a great option for those who are interested. You need to learn about their subscription plans. Filmora software has different subscription plans depending on the purpose of use. These plans are for those who want to edit videos professionally by using a video editor without having to spend a lot of money.
Filmora’s monthly subscription costs $39.99, but you can now pay $19.99
Which is the best deal?
Filmora’s annual subscription costs $67.97, but the current deal is only $67.97, $61.99
You can also purchase a perpetual plan for $97.97.
Get it for $89.99 now.
These plans are only for Filmora users. The plans for Filmora software purchased for business purposes vary depending on the version you purchase. You can contact the team to learn more about the plans and purchase the best subscription plans.
Subscribe to our newsletter
Subscription plans are a great way to access the latest features and software updates. The benefits of purchasing a plan are greater. You receive premium benefits and importance. Senior techies are available to assist you with any questions or doubts.
Download Now:
Filmora for Windows: https://filmora.wondershare.com/video-editor/
Filmora for Mac:https://filmora.wondershare.com/video-editor-mac/
Filmora for iPad:https://apps.apple.com/us/app/filmora-video-editor-on-ipad/id1459336970
Conclusion
The Goods panel includes 12 orders from Shake to NightLife to Instagram-Like, which uses familiar names like Amaro, Brannon, and Hefe. These can add drama to your video editing just as they do still prints. Deformations like glass and water ripple, as well as a set of light leak and film style overlays, are also included. Nearly thirty LUT (lookup table) goods are included, numerous named after the pictures and shows whose colors they emulate — Harry Potter, Game of Thrones, and so on. Those who pay for the subscription interpretation of Filmora get further goods and objects, including movie templates, and color pollutants.