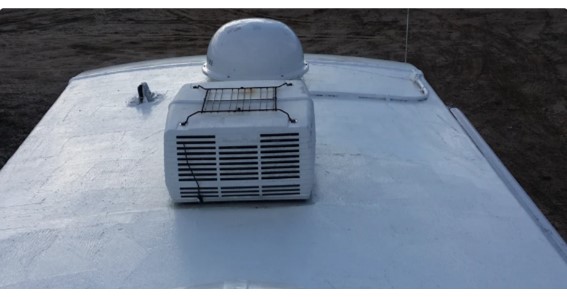
RVs and campers provide countless adventures and memories for their owners. However, these vehicles require regular maintenance to ensure they remain in top condition. One crucial aspect often overlooked by RV owners is the roof, which can develop leaks and damage over time. This comprehensive guide will walk you through the process of using a DIY camper roof sealant, specifically liquid rubber technology, to protect your RV from leaks and ensure it stays in great shape for years to come.
Why Choose Liquid Rubber Technology for Your Camper Roof Sealant?
Liquid rubber technology has become increasingly popular among DIYers as the go-to solution for sealing and repairing camper roofs. This versatile, innovative material offers several advantages over traditional roof sealants:
- Seamless application: Liquid rubber creates a continuous, waterproof barrier without any seams, reducing the risk of leaks.
- Long-lasting protection: With a lifespan of up to 10 years, liquid rubber technology provides extended protection compared to other roof sealants.
- Versatility: Liquid rubber can be used on various surfaces, making it suitable for different types of camper roofs, including metal, fiberglass, and rubber.
- Easy to apply: DIY enthusiasts can quickly apply liquid rubber products using a paintbrush or roller, without the need for professional assistance.
According to The Global Waterproofing Membrane Market, the market for liquid rubber is projected to reach $10.5 billion by 2024, reflecting its growing popularity as a reliable waterproofing solution.
Preparing Your Camper Roof for Sealant Application
Before applying the roof sealant for campers, it’s essential to prepare the roof surface to ensure optimal adhesion. Follow these steps for a successful sealing process:
Safety Precautions
Keep safety in mind when working on your camper roof. Take the following precautions:
- Choose a dry, sunny day to ensure proper drying of the sealant.
- Wear rubber gloves, eye protection, and a mask/respirator (if required) to protect yourself from chemicals and debris.
- Make sure you have secure footing to prevent accidental falls.
Click Here –Meest Fulfillment Services for Ecommerce
Cleaning the Roof
A clean roof surface is critical for proper adhesion of the sealant. Use a suitable cleaning solution, such as Liquid Rubber RV Roof Smart Cleaner, to remove dirt and debris from your camper’s roof. For detailed cleaning instructions, check out this guide: Keeping Your RV Roof Clean: How to Use the Best Rubber Roof Cleaner.
After cleaning the roof, use a scraper to remove any loose debris and old sealant.
How to Use Roof Sealant to Repair an RV Roof: Liquid Rubber Application
With your camper roof clean and prepared, it’s time to apply the liquid rubber roof sealant. Here’s how:
- Mix the liquid rubber sealant: Ensure the sealant is thoroughly mixed for optimal coverage. If your camper roof shows signs of corrosion, apply a primer before the roof coating.
- Apply the sealant: Use a paintbrush or roller to apply a generous coat of the liquid rubber roof sealant. Allow it to sit for a few minutes before removing excess sealant with a clean, damp sponge. Be mindful of the application around any fixtures or seams, as these are common areas for leaks to develop.
- Allow to dry: Wait for the first coat to dry (approximately 8 hours) before applying a second coat. Make sure the sealant doesn’t drip or run, indicating that it’s working effectively.
Inspecting Your Camper Roof After Sealing
Once the sealant is completely dry, inspect your camper’s roof for any drips or runs. If you find any issues, you may need to reapply the sealant. Regular maintenance is crucial for keeping your camper’s roof in top shape. You can find more information on maintaining your RV roof in this guide: Recoating Your RV Roof: When and How Often to Do It.
Tips for Maintaining Your Camper’s Roof
To keep your camper’s roof in excellent condition, follow these maintenance tips:
- Clean and reseal your camper’s roof annually.
- Apply a UV protectant to safeguard against sun damage.
- Regularly inspect your roof for signs of wear, tear, or leaks.
Conclusion
Sealing your camper’s roof is essential for maintaining its condition and protecting it from water damage. Liquid rubber technology offers a reliable, long-lasting solution for DIY enthusiasts looking to tackle this task themselves. By following this comprehensive guide, you’ll be well-equipped to seal your camper roof effectively and enjoy worry-free travels for years to come.
Remember, a well-maintained camper is the key to countless adventures and unforgettable memories. Happy DIYing, and may your next journey be incredible!


