If you are a nature lover and have a spacious backyard at home, who would not love to have a little garden? Having a green thumb and want to grow your own vegetables, flowers, or herbs, then a raised garden bed can be an excellent addition to your backyard.
Firstly, to satisfy your curiosity, raised garden beds are becoming increasingly popular among gardeners because of their numerous benefits, such as improved soil quality, better drainage, and easier maintenance. If you’re interested, here are some easy-to-follow raised garden bed plans to get you started.
But before that, let’s see what options you have for your raised garden bed plans in the backyard.
Basic Rectangular Raised Garden Bed Plan
The most common type of raised garden bed is a basic rectangular shape. It’s simple to build and doesn’t require any complicated carpentry skills.
Tiered Raised Garden Bed Plan
A tiered raised garden bed is an excellent option if you have limited space in your backyard or want to create a visually appealing garden design. The tiered structure allows you to grow different plants at different levels, making it easy to separate different types of plants or create a beautiful cascading effect.
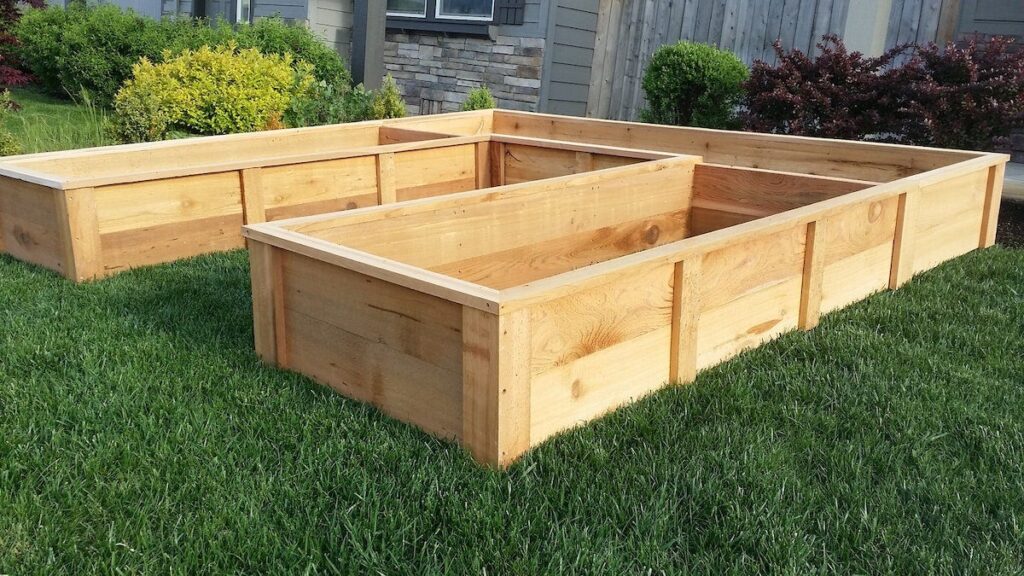
U-Shaped Raised Garden Bed Plan
A U-shaped raised garden bed is a great option for creating a functional and accessible garden design. The U-shape provides easy access to all areas of the bed without having to step on the soil, which can help prevent soil compaction and damage to plant roots.
Now that you know your garden bed options, let’s get started with the steps to build one.
Step 1: Choose the design and location
Design and location are crucial factors to consider when building a raised garden bed. With options such as rectangular, tiered, or U-shaped beds, it’s important to choose a design that suits your needs. Consider the available space in your backyard, ensuring ample sunlight, proper water drainage, and accessibility for optimal plant growth and the success of your garden bed.
Step 2: Gather materials
You’ll typically need untreated lumber boards, screws, a saw, a drill, a level, and landscaping fabric. Only use untreated lumber to prevent harmful chemicals from leaching into your soil and affecting your plants.
Step 3: Build the bed
To build a basic rectangular raised garden bed, start by measuring and marking the dimensions for the length, width, and height of the bed. Cut the lumber boards accordingly using a saw, and then attach them with screws and a drill. Use a level to ensure the bed is level, as this will promote proper water drainage and plant growth, resulting in a sturdier and more stable structure.
Step 4: Add supports
Reinforcing the corners of your raised garden bed with additional lumber and screws will provide stability, especially for larger or taller beds, preventing warping or sagging over time and ensuring a longer-lasting and durable structure.
Step 5: Install landscaping fabric
To prevent weeds and competition with plants, use landscaping fabric as a barrier between the soil and lumber in your raised garden bed. Lay the fabric over the bottom of the bed, cut holes for drainage and plant placement, and effectively keep weeds at bay.
Step 6: Fill with soil
After installing landscaping fabric, fill the raised garden bed with a mixture of topsoil and compost for optimal plant growth. Avoid overcrowding by leaving enough space for plants to thrive. Level the soil surface and water it thoroughly to create an ideal environment for your plants to flourish.
Bottom Line
By following these steps, you can easily build a functional and attractive raised garden bed in your backyard. Maintaining your raised garden bed is also relatively easy. Regular watering, weeding, and monitoring for pests and diseases are essential tasks to ensure healthy plant growth. Get started with your raised garden bed project today and enjoy the benefits of gardening right in your own backyard.